in: Acumatica Tips & Tricks, Acumatica, Company News
Acumatica Cloud ERP has one of the most comprehensive payroll systems on the market, and it is easy to use. With Acumatica Payroll, processing payroll does not have to take long hours to complete. This demo will be the first in a series of tips and tricks exploring this component of the popular Cloud ERP.
In this tutorial, we look at how to set up your company’s payroll preferences. Using the Payroll Preferences module, you can do three main things:
- configure company-wide payroll settings
- indicate posting and retention settings
- specify exceptions for transaction dates
Let’s walk through the steps of each of these areas.
Using Acumatica-Payroll Preferences
From the main Payroll screen, navigate to the far right of the screen to Preferences. Double click on the first selection, Payroll Preferences. Basically, this information tells the system from where to pick up the GL account and subaccounts to classify transactions and set requirements for other payroll processing tasks.
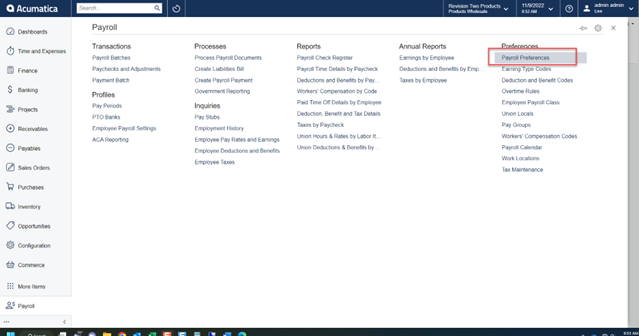
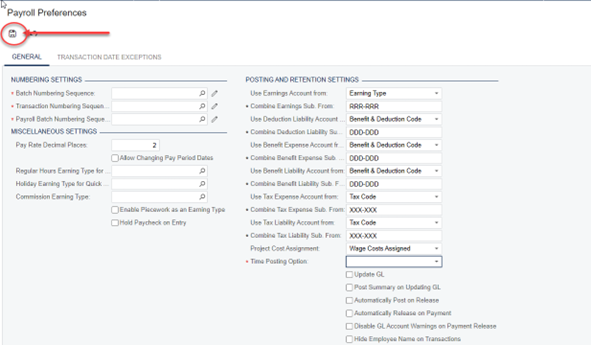
On the Payroll Preference screen, there are two standard tabs: General and Transaction Date Exceptions. The Transaction Date Exceptions tab is used to specify holidays and weekends as dates that transactions are not processed as well as any other dates the company wishes to exempt. For this demo, we will focus on the General tab.
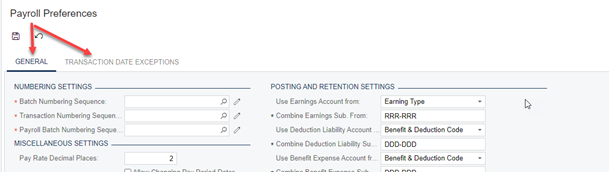
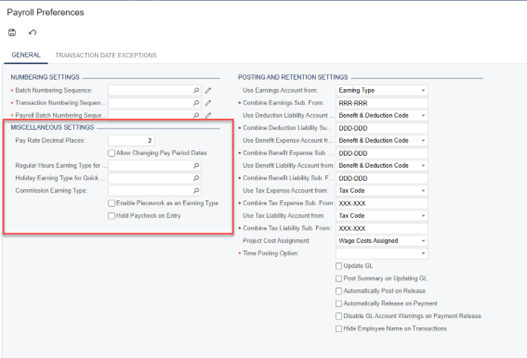
The General tab has three sections, each for setting the identifiers for numbering sequences to keep track of batches and transactions and configuring company-wide payroll settings. These fields are mandatory as identified by the red asterisk next to each.
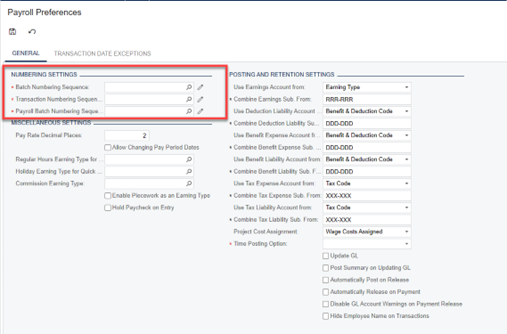
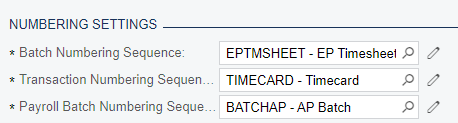
The first section, Numbering Settings, identifies the number sequence to be used for tracking batches and transactions generated in Payroll and posted to the ledger. By clicking on the Finder 🔍 icon, a new window opens with a list of numbering IDs that may be used.

By clicking on the Edit icon, you can modify an existing number ID or sequence or create a new one.
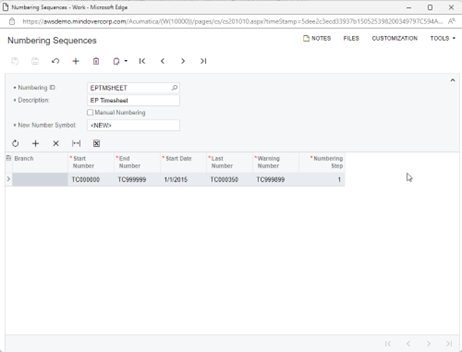
Each numbering sequence tracks different information:
- Batch Numbering is used for transactions generated in Payroll and posted to GL
- Transaction Numbering is used for referencing and tracking payroll transactions such as direct deposits, checks, and adjustments.
- Payroll Batch Numbering is used to order/track payroll batches.
These may be specified as needed (pictured entries are for illustration purposes only).
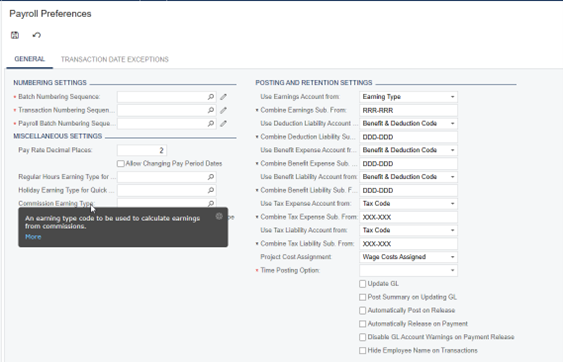
The second section, Miscellaneous Settings, is mostly self explanatory. It is used to set up additional configurations for payroll settings such as decimal places, allowing for changing pay period dates, placing a new paycheck in On Hold status, if necessary, and enabling piecework as an earning type. Let’s look at some of the other options.
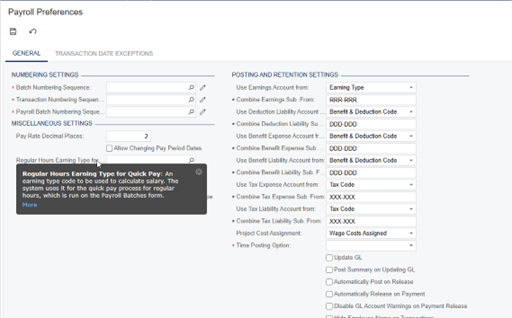
Earning Type codes may be used to calculate salary, which the system can use for quick-pay processing of regular hours. The Earning Type Codes form is used to define, edit, or review earning types.
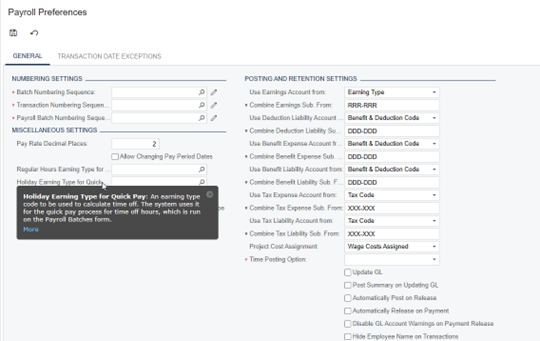
The Holiday Earning Type Codes for quick pay are used to calculate time off. As with all earning types, it is run on the Payroll Batches form.
Commission Earning Type is for calculating commissions.
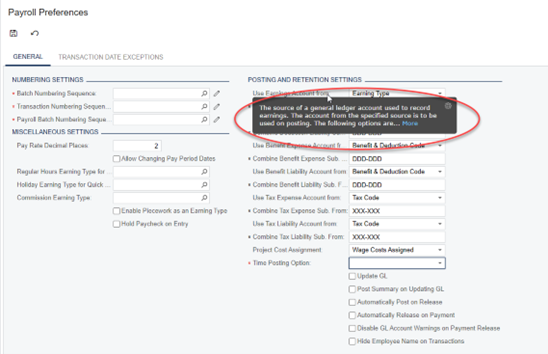
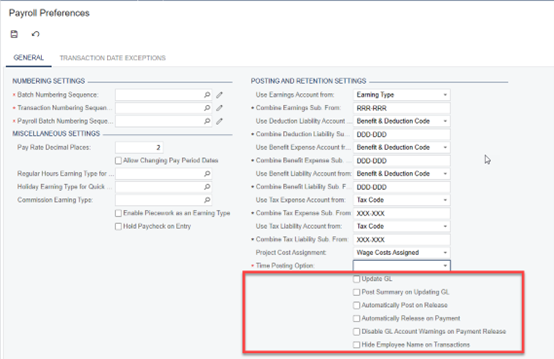
The third section, Posting and Retention Settings, is used to set the general ledger account setting for earnings, deductions, expense and liabilities, and taxes. This section designates the information necessary for ensuring that payroll is posted correctly and meets company criteria. Note: Hovering the mouse pointer over each setting triggers a pop up to explain its use.
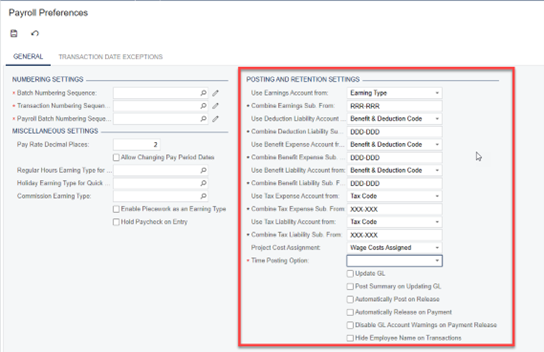
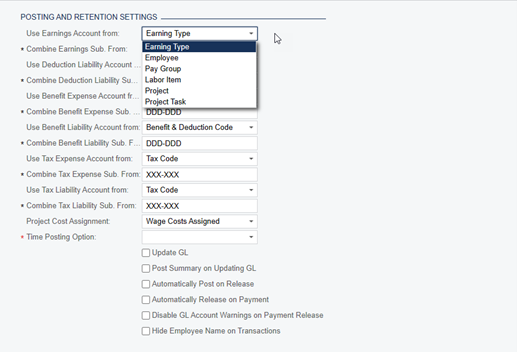
To designate the main accounts (Earnings and Deduction Liability, Benefit Expense and Liability, and Tax Expense and Liability), use the drip down arrows to select the appropriate account.
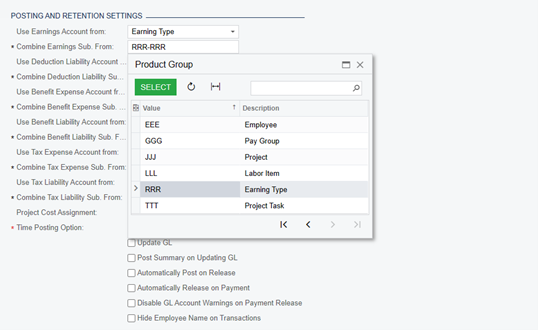
For the subaccounts (asterisk defined), place cursor in the field and hit F3. This will display a selection of Product Group codes. Simply select the appropriate code by double clicking on it. Follow these steps for each field.
There are a series of check boxes with parameters that may be used to further set company payroll preferences. Simply select as necessary by clicking into the box.
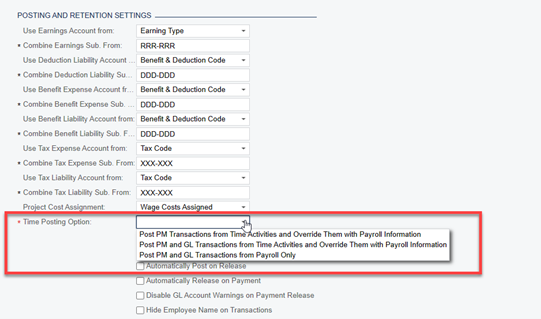
Please note: One very important feature in this section is the Time Posting Option. This must be set as it dictates the timing of posting.
Once all preferences are set, click the Save icon at the top left of the screen. Changes to these preferences can be made at any time.
See it in action with this video!