in: Sage 300 ERP, Sage 300 ERP Tips and Tricks|Software Tips and Tricks, Company News
Setting up a new customer in accounts receivable in Sage 300 is a simple task. In this tutorial, we will go through this process step by step.
Sage 300 Accounts Receivable
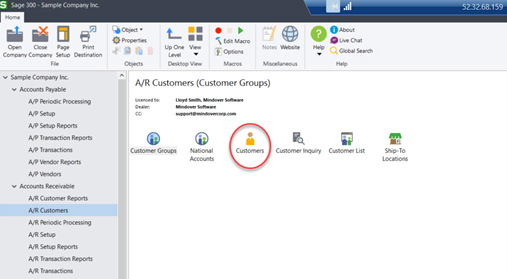
Start Sage 300 and navigate to Accounts Receivable → A/R Customers → Customers
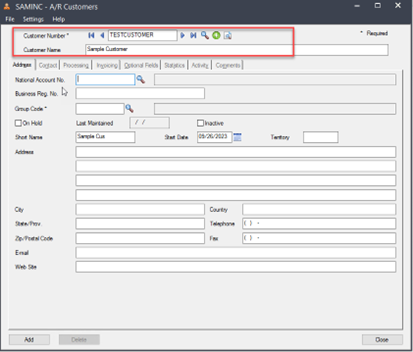
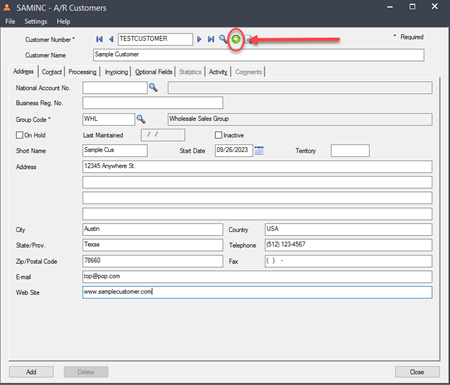
In the A/R Customers window, we will enter the customer’s demographic information. First, create a customer number for the customer. In the next field, enter the customer’s full name.
If your company uses National Accounts Management, the customer can be assigned to a national account, the customer’s national account can be changed, or they can be removed from a national account. If necessary, enter the business registration number for the customer. This number is required for tax purposes in some jurisdictions. For this tutorial, we will not use these fields
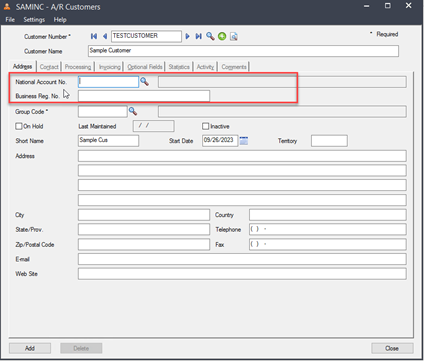
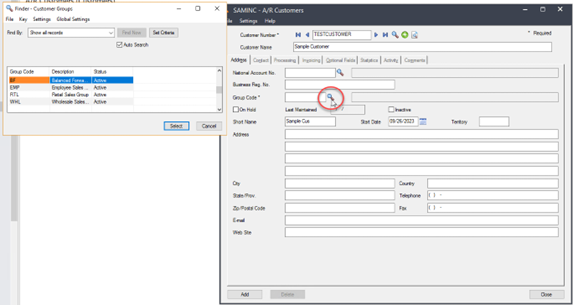
The Group Code is a required field for each customer and national account, if used. Either type the code or use the Finder to select it. These are codes that would have been established during the setup of the A/R module.
For the rest of the Address tab, simply fill in the remaining information. Once complete, then add the record to by clicking the add record ![]() icon. This will enable us to access the other tabs.
icon. This will enable us to access the other tabs.
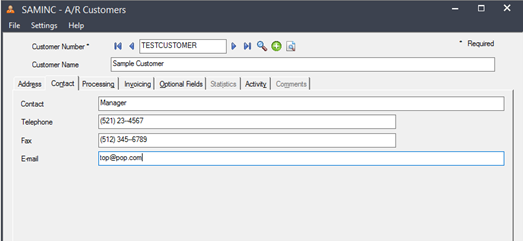
On the Contact tab, enter the customer’s main contact information. This will usually be a manager or senior representative of the company.
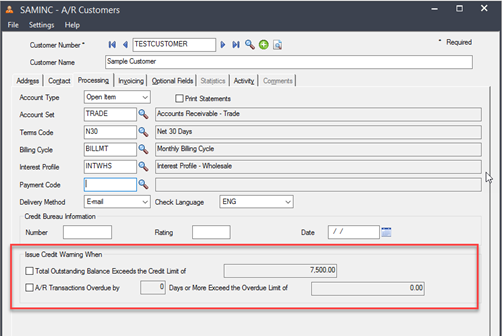
The Processing tab allows us to set the billing parameters. Simply fill in the information according to the contract or your company’s requirements. Here we can set account type, statement printing, billing terms, billing cycle, interest, payment types, invoice delivery methods, and language preference. If the customer has credit bureau information, it can be entered on this tab.
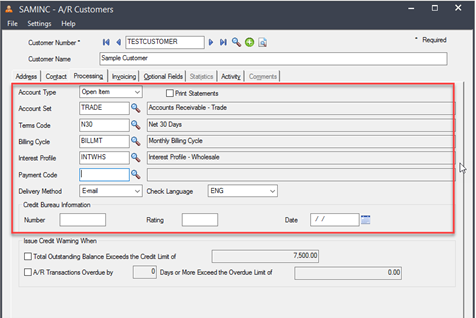
Also, it is this tab that allows us to set up a warning to inform us of a customer reaching or exceeding their credit limit and create an alert when transactions are overdue by a certain number of days or amount.
On the Invoicing tab, we can enter all the parameters for how shipments will be billed. Here, just fill in each field according to the customer and/or company requirements for purchase orders. Most of this is not required, yet it is advisable to fill in as much as necessary.

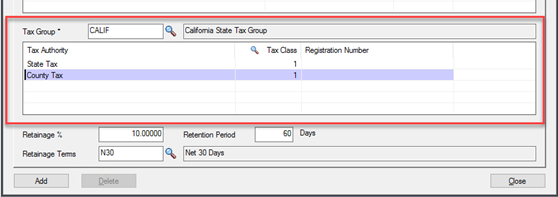
The only *required field is the Tax Group. Always select this when setting up a new customer. The system will not let you permanently add the customer without this field being entered.
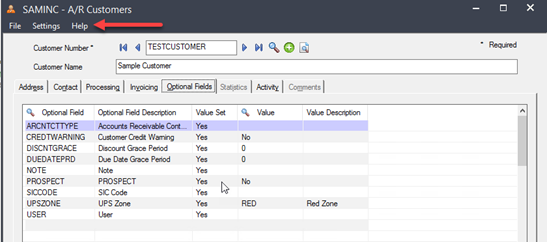
The Options tab: Optional fields are available only if you use Transaction Analysis and Optional Field Creator.
You can use the default optional fields that appear or delete them. You can also add different optional fields that you have set up for use with each screen. For more information, see About Optional Fields in Accounts Receivable in the Help topic.
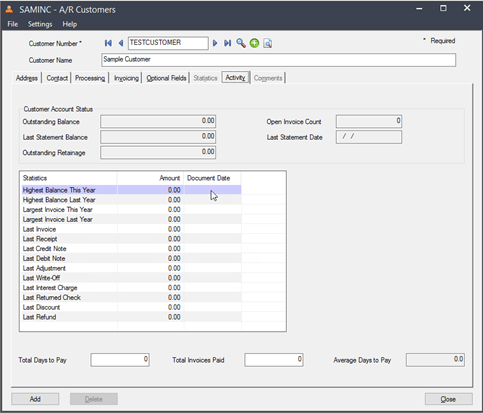
On the Activity tab, we can view current- and previous-year account activity for the selected customer. It is important to edit activity statistics when first setting up customer accounts, if so desired.
Once all desired information is entered for the new customer, click the Add button to permanently add the record to the system. Remember, a customer can be deleted if necessary.

See it in action with this video!